Quantcast
Channel: kilala.nl - Blog posts
Viewing all 173 articles
Browse latest View live

RHCE exams, here I come

$
0
0

Yes, this blog has been quiet for quite a while. In part this is because I've put most of my private stuff behind logins, but also because I've had my professional development on a backburner due to my book translation. 


But now I've started studying for my RHCE certification. A year ago (has it been that long?!) I achieved my RHCSA, which I'll now follow up with the Engineer's degree. Red Hat will still offer the RHEL6 exams until the 19th of december, so I'd better get my ass in gear :)


Let's do this!

$
0
0
RHCE exam in 18 hours

If I'm not ready by now, nothing much will help :)


Looking forward to taking the RHCE exam tomorrow and whichever way it goes, I'm also looking forward to the SELinux course I'll be taking at IT Gilde tomorrow night. 


Passed my RHCE

$
0
0
Snoopy is happy

Huzzah! I passed, with a score of 260 out of 300... That makes it roughly 87%, which is an excellent ending to four months of hard prepwork.


The great thing is that I'm now able to rack up 85 CPE for my CISSP! 25 points in domain A and 60 points in domain B, which means that my CISSP renewal for this year and the next two is a basic shoe-in. Of course, I'll continue my training and studies :)


My RHCE experience was wonderful. Like last year with my RHCSA, I took the Red Hat Kiosk exam in Utrecht.


A while back I was contacted by Red Hat, to inform me I'm a member Red Hat 100 Kiosk Club which basically means that I'm one of the first hundred people in Europe to have taken a Kiosk exam. As thanks for this, they offered me my next Kiosk exam for free, which was yesterday's RHCE. Nice!


The exam was slated for 10:00, I showed up at 09:30. The reception at BCN in Utrecht was friendly, with free drinks and comfy seats to wait. The Kiosk setup was exactly as before, save the slot for my ID card which was already checked at the door. The keyboard provided was pretty loud, so I'm sorry to the other folks taking their exams in the room :)


All in all I came well prepared, also with thanks to my colleagues for sharing another trial exam with me.


Branching out, learning about databases

$
0
0

Since achieving my RHCE last November I've taken things easy: for three months I've done nothing but relaxing and gaming to wind down from the big effort. But now it's time to pick up the slack again!


Over the past years I've worked with many Unix systems and I've also worked with with monitoring, deployment and security systems. However, I've never done any work with databases! And that's changed now that I'm in a scrum team that manages an application which runs on Websphere and Oracle. So here I go! I really want to know what I'm working with, instead of just picking up some random terms left and right. 


Starting per March, I'm studying Oracle 11. And to keep myself motivated I've set myself the goal of achieving basic Oracle certification, which in this case comes in the shape of the OCA (Oracle Certified Associate). The certification consists of two exams: a database technology part and an SQL part, the latter of which may be taken online.


This is going to be very challenging for me, as I've never been a good programmer. Learning SQL well enough to write the small programs associated with the exam is going to be exciting but hard :)


First attempt at SQL exam: did not pass

$
0
0

After roughly three months of studying (at night and on the train) I took a gamble: last night I took my Oracle SQL exam 1Z0-051. Along the way I've learned two things:


  1. The contents of the exam are rather different (and more difficult!) from the practice exams and study materials that came with the two books I have.

  2. It's not a good idea to attempt the online exam at 23:00, after a long day of work and an evening of studying :D


I'm going to "deflate" for a few weeks before continuing my studies. I really, really want to achieve my OCA before the end of the year, so I'd better get a hurry on after that.


But first, my first three days of Puppet training! More exciting new things to learn!


Puppet Practitioner course completed

$
0
0

The past few months I've been hearing more and more about Puppet, software that allows for "easy" centralized configuration management for your servers. Monday through Wednesday were spent getting familiar with the basics of the Puppet infrastructure and of how to manage basic configuration settings of your servers. It was an exhausting three days and I've learned a lot!


The course materials assumed that one would make use of the teacher's Puppet master server, while having a practice VM on their own laptop (or on the lab's PC). As I'm usually pretty "balls to the wall" about my studying, I decided that wasn't enough for me :p


Over the course of these three days I've set up a test environment using multiple VMs on my Macbook, running my own Puppet master server, two Linux client systems and a Windows 8 client system. The Windows system provided the most challenges to me as I'm not intimately familiar with the Windows OS. Still, I managed to make all of the exercises work on all three client systems! 


Many thanks to the wonderful Ger Apeldoorn for three awesome days of learning!


Some hard work that I need to pull through!

$
0
0

Aside from my day to day activities in the fields of Unix/Linux and security, I want to ensure that I keep up with relevant and useful skills. I believe that expanding my horizons and keeping up with tech outside of my usual activities is a very useful activity. As the proverbial "big stick" I challenged myself to achieve two professional certifications this year:


  1. Oracle Certified Associate, for Oracle 11. Many of my activities so far have touched on databases, but my current project's the first time that I've had to actually dive into them. I would like to actually know something about the stuff I'm working with, hence I'd like to achieve at least a basic set of Oracle DBA skills. 

  2. Puppet Professional. Puppet's one of the more recent techs that I feel has a huge future. As the saying goes "I want me some of that!". While I have no current need for Puppet, I am keen to soon get started on a Puppet job!


Of course, the year isn't very long anymore, so I'd better get cracking!


My first foray into pen-testing

$
0
0

A few days ago, my buddies at IT Gilde were issued a challenge by the PvIB (Platform voor Informatie Beveiliging), a dutch platform for IT security professionals. On October 6th, PvIB is holding their annual pen-testing event and they asked us to join in the fun. I've never partaken in anything of the sorts and feel that, as long as I keep calling myself "Unix and Security consultant", I really ought to at least get introduced to the basics of the subject :)


So here we go! I'm very much looking forward to an evening full of challenges! 


The PvIB folks warn to not have any sensitive or personal materials on the equipment you'll use during the event, so I went with Mark Janssen's recommendation and bought a cheap Lenovo S21e-20 notebook. I'll probably upgrade that thing to Windows 10 and load it up with a wad of useful tools :)


PvIB Pen.Testing workshop

$
0
0
The CTF site

Last night I attended PvIB's annual pen-testing event with a number of friends and colleagues. First impressions? It's time for me to enroll as member of PvIB because their work is well worth it!


In preparation to the event I prepared a minimalistic notebook computer with a Windows 8 and Kali Linux dual-boot. Why Kali? Because it's a light-weight and cross-hardware Linux installer that's chock-full of security tools! Just about anything I might need was pre-installed and anything else was an apt-get away. 


Traveling to the event I expected to do some networking, meeting a lot of new people by doing the rounds a bit while trying to pick up tidbits from the table coaches going around the room. Instead, I found myself engrossed in a wonderfully prepared CTF competition. In this case, we weren't running around the conference hall, trying to capture each other's flags :D The screenshot above shows how things worked:


  1. Each participant would register an account on fragzone.nl

  2. Your personal dashboard showed the available challenges, each worth a number of points.

  3. Supposedly easy challenges would net you 50-100 points, while big ones would net 250, 500 or even 1000!

  4. Each challenge would result in a file or piece of text, which one needed to MD5 and then submit through the dashboard.


I had no illusions of my skillset, so I went into the evening to have fun, to learn and to meet new folks. I completely forgot to network, so instead I hung out with a great group of students from HS Leiden, all of whom ended up really high in the rankings. While I was poking around 50-200 point challenges, they were diving deeply into virtual machine images searching for hidden rootkits and other such hardcore stuff. It was great listening to their banter and their back-and-forth with the table coach, trying to figure out what the heck they were up to :)


I ended up in 49th place out of 85 participants with 625 points. That's mostly middle of the pack, while the top 16 scored over 1400 (#1 took 3100!!) and the top 32 scoring over 875. 


Challenges that I managed to tackle included:


  • A morse code message :p

  • A rot13 message :p

  • A 4096-layer zip/7z file with permutating passwords

  • A telnet server which provided helpful hints about the username/password expected

  • A ZIP file with multiple hidden messages, where I found only one.


Together with Cynthia from HSL, we also tried to figure out:


  • A challenge involving GPS tracking data from a satellite

  • A steganographically encoded JPG image


The latter was a wonderful test and we almost had it! Using various clues from the web, which involved multiple steganography tools provided by Alan Eliason, ImageMagick and VLC. We assumed it was a motion-jpeg image with differences in the three frames detected, but that wasn't it. Turns out it -was- in fact steganography using steghide.


Ironically the very first test proved very annoying to me, as the MD5 sum of the string I found kept being rejected. It wasn't until our coach hinted at ending NULL characters that I switched from "cat $FILE | md5sum" to "echo -n $STRING | md5sum". And that's what made it work. 


To sum things up: was I doing any pen-testing? No. Did I learn new things? Absolutely! Did I have a lot of fun? Damn right! :)


A cheap laptop as pen-testing portable: Lenovo Ideapad s21e-20 and Kali

$
0
0
the Lenovo Ideapad s21e-20 Windows 8

In preparation of the recent PvIB penetration testing workshop, I was looking for a safe way to participate in the CTF. I was loathe of wiping my sole computer, my Macbook Air and I also didn't want to use my old Macbook which is now in use as Dana's plaything. Luckily my IT Gilde buddy Mark Janssen had a great suggestion: the Lenovo Ideapad s21e-20.


Tweakers.net gave it a basic 6,0 out of 10 and I'd agree: it's a very basic laptop at a very affordable price. At €180 it gives me a wonderfully portable system (light and good formfactor), with a decent 11.6" screen, an okay keyboard and too little storage. Storage is the biggest issue for the purposes I had in mind! Biggest annoyance is that the touchpad doesn't work under Linux without lots of fidgetting.


I wanted to retain the original Windows 8 installation on the system, while allowing it to dual-boot Kali Linux. In order to get it completely up and running, here's the process I followed. You will need a bunch of extra hardware to get it all up and running.


  • An external USB drive, at least 20GB in size, that you can safely wipe.

  • A USB mouse, because the touchpad doesn't work in Windows.

  • A USB wifi dongle that is support by Kali; most TRENDNET dongles will work. My buddy Johan lent me his TEW-424UB, but the 648UBM is also available on the cheap.

  • An SDHC microSD card, preferably 32GB or 64GB in size. 


So here we go!


  1. Unbox and install as usual. Walk through the complete Windows setup.

  2. Feel free to plug the SDHC microSD card into the storage slot of the laptop. You won't be using it for now, but that way you won't lose it. 

  3. Under Windows Update, disable the optional update for the Windows 10 installer. You don't have enough space for Windows 10 anyway. Then run all required updates, to keep things safe.

  4. Configure Windows as desired :)

  5. Using the partitioning and formatting tool of Windows, cut your C: drive by 1.5GB. Create a new partition on the free space created thusly. 

  6. Download the Kali Linux 32-bit live CD.

  7. Get a tool like Rufus and burn the Kali ISO to the external USB drive.

  8. Restart into UEFI, by using the advanced options menu of the Windows restart. Windows key -> Power icon -> shift-click "restart" -> advanced -> UEFI.

  9. In UEFI go to the "boot" tab. Set the boot mode to "Legacy Support", boot priority to "Legacy first" and USB boot to "enabled". 

  10. Save, then plugin the Wifi dongle on the other USB port and reboot. Boot Kali from the USB drive. 

  11. Once you've booted to the desktop, you're stuck without a mouse :p Press the Windows Flag key on your keybard to popup the search bar. Type "install" and start the Kali installer. 

  12. The installer starts in a new window, but it will only be partially visible! You'll need to navigate using the arrow keys and you'll need to make a few good guesses. For most questions you can use the default value as provided, or confirm the required information using the Enter key.

  13. If you would like to change your Location, the bottom-most option in the list is "Other" which will allow you to select "Europe" and so on.

  14. Once you reach the "Partition disks" screen, choose "Manual".

  15. Your internal storage is /dev/mmcblk0, while the SDHC card in the slot will be /dev/mmcblk1. Ensure that the 1.5GB partition on blk0 is made into /boot as ext4. Also partition the SDHC card to have at least 20GB of / as ext4 and swap (4GB). If desired you may also create a third partition as FAT32, so you can have more scratch space to exchange files between Windows and Linux. 

  16. The bottom-most option in the partitioning screen is "save and continue". Do not mess with TAB etc. Once you're done with the partition tables, just push the down arrow until it keeps beeping and press Enter.

  17. Once asked where to install GRUB, just chuck it on the /dev/mmcblk0 MBR. This kills the Windows 8 default bootloader, but Windows will work just fine. 

  18. Finish the installation by answering the rest of the questions.

  19. Shutdown the laptop, unplug the USB drive and replace it with your USB mouse. Poweron the laptop and boot Kali.


The good thing is that you won't need to mess around with extra settings to actually boot from the SDHC card! On older Ideapad laptops this was a lot of hassle and required extra work to boot from SD


Now, we're almost there!


  1. Follow these instructions to allow GRUB to boot Windows again. At the end use the update-grub command instead of grub2-mkconfig. Use fdisk -l /dev/mmcblk0 to find which partition you need to at to 15_Windows. In my case it was hd0,1. That's the EFI partition. You can reboot to verify that Windows boots again. It will complain that "no operating system was found", but Windows will boot just fine!

  2. The guys at blackMORE Ops have created a nice article titled "20 Things to do after installing Kali Linux". A lot of these additions are very nice, feel free to follow them. 

  3. Follow the Debian Wiki instructions on setting up the WL drivers for the BCM43142 onboard wifi card. Reboot afterwards and unplug the USB wifi dongle before starting back into Linux. Your onboard wifi will now work!

  4. If, like me, you appreciate your night vision go ahead and install F.Lux for Linux. In my case I start it up with: xflux -l 52.4 -g 5.3 -k 2600. You can put that in a small script and include it with the startup scripts of Gnome.  


And there we have it! Your Ideadpad s21e is now dual-booting Windows 8 and Kali Linux. Don't forget to clone the drives to a backup drive, so you won't have to redo all of these steps every time you visit a hacking event :) Just clone the backup back onto the system afterwards, to wipe your whole system (sans UEFI and USB controllers). 


A new project: a private Yubikey server infrastructure

$
0
0

I was recently gifted a Yubikey Neo at the Blackhat Europe 2015 conference. I’d heard about Ubico’s nifty little USB device before but never really understood what the fuss was about. I’m no fan of Facebook or GMail, so instead I thought I’d see what Yubikey could do in a Unix environment!


I've been playing with the YK for two days now and I've managed to get the following working quite nicely:


  • A local Yubikey validation server

  • Running on CentOS 6.7 (aka RedHat Enterprise Linux 6.7)

  • With SSH servers using Yubikey as second factor for user login


I have written an extensive tutorial on how I built the above. In the near future you may expect expansions, including tie-in to LDAP as well as BoKS. 


In-between assignments? What an opportunity!

$
0
0

It's been two weeks now since I've left my friends and colleagues at my previous assignment. I didn't have a new gig lined up, so for now I'm "in-between assignments". Am I having a dreary time and am I scrambling for something new? Maybe surprisingly, I'm not! I've been busier than ever!


I'd argue that some downtime between jobs is an excellent opportunity! 


  1. Learn something new

  2. Meet new people

  3. Deflate


Learn something new


Now is your chance to finally get started on all those things you've been meaning to learn and study! Make sure to plan a few hours every day to spend on research and studies. This will also help you maintain your workday rhythm. 


Meet new people


Of course you're going job hunting! Putting that aside though, I've found it tremendous to also go and meet people in my business just for the heck of it. Some would call this networking, I just call it fun :)


Why not visit one of your industry's convention, now that you have the time? Or use Meetup.com to find social gatherings that look interesting or beneficial. Every week there's something you could help out with or learn about.


Deflate


And you know what? Relish your downtime! Get some exercise, go for a walk, enjoy the scenery. Feeling ambitious and feeling the urge to start running? Give the famous "Couch to 5k" schedule a shot! Not thinking about work a few hours may help you a bit in pushing harder when you need to!


What have I been doing?


I've spent a few days learning a new programming language (Python in my case) by signing up for Codecademy. I've also spent a few days learning about MFA tokens and on integrating those with software I'm already familiar with. And now I'm also hitting the books on Oracle and SQL. 


I've hit the Blackhat Europe convention and learned a lot of new things. I'll also be meeting with people from a big-name college and with an IT service provider. Both talks could perhaps lead to something in the future, but for now I simply want to learn about their activities.  


And after all that hard work-that's-not-actually-work? I'm deflating by taking some walks around town and by playing a game or two. I really ought to thank my employer for this great "work-cation".


Changing users' passwords in Active Directory 2016, from anywhere

$
0
0

As part of an ongoing research project I'm working on, I've had the need to update an end-users' password in Microsoft's Active Directory. Not from Windows, not through "ADUC" (AD Users and Computers), but from literally anywhere. Thankfully I stumbled upon this very handy lesson from the University of Birmingham. 


I've tweaked their exemplary script a little bit, which results in the script shown at the bottom of this post. Using said script as a proof of concept I was able to show that the old-fashioned way of using LDAP to update a user's password in AD will still work on Windows Server 2016 (as that's the target server I run AD on). 


Called as follows:


$ php encodePwd.php user='Pippi Langstrumpf' newpw=Bora38Sr > Pippi.ldif

Resulting LDIF file:


$ cat Pippi.ldif 
dn: CN=Pippi Langstrumpf,CN=Users,DC=broehaha,DC=nl
changetype: modify
replace: unicodePwd
unicodePwd:: IgBOAG8AggBhQDMAOQBGAHIAIgA=

Imported as follows:


$ ldapmodify -f Pippi.ldif -H ldaps://win2016.broehaha.nl -D 'CN=Administrator,CN=Users,DC=broehaha,DC=nl' -W
Enter LDAP Password:
modifying entry "CN=Pippi Langstrumpf,CN=Users,DC=broehaha,DC=nl"

Once the ldapmodify has completed, I can login to my Windows Server 2016 host with Pippi's newly set password "Bora38Sr".


<?php

function EncodePwd($pw) {
$newpw = '';
$pw = "\"" . $pw . "\"";
$len = strlen($pw);
for ($i = 0; $i < $len; $i++)
$newpw .= "{$pw{$i}}\000";
$newpw = base64_encode($newpw);
return $newpw;
}

if($argc > 1) {
foreach($argv as $arg) {
list($argname, $argval) = split("=",$arg);
$$argname = $argval;
}
}

$userdn = 'CN='.$user.',CN=Users,DC=broehaha,DC=nl';

$newpw64 = EncodePwd($newpw);

$ldif=<<<EOT
dn: $userdn
changetype: modify
replace: unicodePwd
unicodePwd:: $newpw64
EOT;

print_r($ldif);

?>


My first online gaming experience: Darkscapes MUD

$
0
0

Fifteen years ago I graduated college at Hogeschool Utrecht. Before I got that far, I spent four years studying electronics, programming, telecommunications and more. I also had a lot of fun with my classmates! At the time I was already familiar with role playing as well as trading card games (D&D, Magic, etc), but my classmate Erik introduced me to the joys of Warhammer 40k and World of Darkness games. 


My biggest time waster in first and second year was something entirely different though: it was my introduction to online gaming, as well my first MMORPG! A few students at HvU ran a MUD (multi-user dungeon) on a school server and I spent hours questing and talking to other players. It was a grand experience, especially since the text-based interface was light enough to even work on a very slow Internet connection. Through the game I went on to meet Maya Deva, a woman who was absolutely dedicated to her D&D games and who went on to work for TSR a little while. 


Over the years I've fondly remembered that MUD, whose name escaped me. I'd always wondered whether it was still running on some hidden-away server somewhere.


Turns out that it has! Much to my surprise, my ITGilde colleague Mark was one of the admins of that MUD, which was called DarkScapes. It's not the same instance I used to play in (my account "Beowulf" was gone), but it's a rebuild based off old backups. Still, it was great to find this relic of my past and to walk that world around again!


Using the Nexpose API in Linux shell scripts to bulk-create users

$
0
0

The past few weeks I've spent at $CLIENT, working on their Nexpose virtual appliances. Nexpose is Rapid7's automated vulnerability scanning tool, which may also be used in unison with Rapid7's more famous product: Metasploit. It's a pretty nice tool, but it certainly needs some work to get it all up and running in a large, corporate environment.


One of the more practical aspects of our setup, is the creation of user accounts in Nexpose's web interface. Usually, you'd have to click a few times and enter a bunch of textfields for each user. This gets boring for larger groups of users, especially if you have more than one Security Console host. To make our lives just a little easier, we have at least setup the hosts to authenticate against AD.


I've fiddled around with Nexpose's API this afternoon, and after a lot of learning and trying ("Van proberen ga je het leren!" as I always tell my daughter) I've gotten things to work very nicely! I now have a basic Linux shell script (bash, but should also work in ksh) that creates user accounts in the Nexpose GUI for you!


Below is a small PoC, which should be easily adjusted to suit your own needs. Enjoy!


=====================================


#!/bin/bash
 
# In order to make API calls to Nexpose, we need to setup a session.
# A successful login returns the following:
# <LoginResponse success="1" session-id="F7377393AEC8877942E321FBDD9782C872BA8AE3"/>
 
NexposeLogin() {
        NXUSER=""
        NXPASS=""
        NXSERVER="127.0.0.1"
        NXPORT="3780"
        API="1.1"
        URI="https://${NXSERVER}:${NXPORT}/api/${API}/xml"
        NXSESSION=""
 
        echo -e "\n===================================="
        echo -e " LOGGING IN TO NEXPOSE, FOR API CALLS."
        echo -e "\n===================================="
        echo -e "Admin username: \c"; read NXUSER
        echo -e "Admin password: \c"; read NXPASS
 
        LOGIN="<LoginRequest synch-id='0' password='${NXPASS}' user-id='${NXUSER}'></LoginRequest>"
 
        export NXSESSION=$(echo "${LOGIN}" | curl -s -k -H "Content-Type:text/xml" -d @- ${URI} | head -1 | awk -F\" '{print $4}')
}
 
# Now that we have a session, we can make new users.
#    You will need to know the ID number for the desired authenticator.
# You can get this with: <UserAuthenticatorListingRequest session-id='...'/>
#    A user request takes the following shape, based on the API v1.1 docu.
# <UserSaveRequest session-id='...'>
# <UserConfig id="-1" role-name="user" authsrcid="9" authModule="LDAP" name="apitest2"
# fullname="Test van de API" administrator="0" enabled="1">
# </UserConfig>
# </UserSaveRequest>
# On success, this returns:
# <UserSaveResponse success="1" id="41">
# </UserSaveResponse>
 
NexposeCreateUser() {
        NEWUSER="${1}"
        SUCCESS="0"
        NXAUTHENTICATOR="9" # You must figure this out from Nexpose, see above
        NXROLE="user"
        SCRATCHFILE="/tmp/$(basename ${0}).temp"
 
        echo "<UserSaveRequest session-id='${NXSESSION}'>" > ${SCRATCHFILE}
        echo "<UserConfig id='-1' role-name='${NXROLE}' authsrcid='${NXAUTHENTICATOR}' authModule='LDAP' name='${NEWUSER}' fullname='${NEWUSER}' administrator='0' enabled='1'>" >> ${SCRATCHFILE}
        echo "</UserConfig>" >> ${SCRATCHFILE}
        echo "</UserSaveRequest>" >> ${SCRATCHFILE}
 
        SUCCESS=$(cat ${SCRATCHFILE} | curl -s -k -H "Content-Type:text/xml" -d @- ${URI} | head -1 | awk -F\" '{print $2}')
        [[ ${SUCCESS} -eq 0 ]] && logger ERROR "Failed to create Nexpose user ${NEWUSER}."
        rm ${SCRATCHFILE}
}
 
NexposeLogin
NexposeCreateUser apitest1


Running Jira locally on Mac OS X

$
0
0
Jira on OS X

It's no secret that I'm a staunch lover of Atlassian's Jira, a project and workload management tool for DevOps (or agile) teams. I was introduced to Jira at my previous client and I've introduced it myself at $CURRENTCLIENT. The ease with which we can outline all of our work and divide it among the team is wonderful and despite not actually using "scrum", we still reap plenty of benefits!


Unfortunately I couldn't get an official Jira project setup on $CUSTOMER's servers, so instead I opted for a local install on my Macbook. Sure, it foregoes a lot of the teamwork benefits that Jira offers, but at least it's something. Besides, this way I can use Jira for two of my other projects as well! 


Getting Jira up and running with a standalone installation on my Mac took a bit of fiddling. Even Atlassian's own instructions were far from bullet proof.


Here's what I did:


  1. Download the OS X installer for Jira. It comes as a .tgz.

  2. Extract the installer wherever you'd like; I even kept it in ~/Downloads for the time being.

  3. Make a separate folder for Jira's contents, like ~/Documents/Jira.

  4. Ensure that you have Java 8 installed on your Mac. Get it from Oracle's website.

  5. Browse to the unpacked Jira folder and find the script "check-java.sh". You'll need to change one line so it reads as follows, otherwise Jira won't boot: "$_RUNJAVA" -version 2>&1 | grep "java version" | (

  6. Find the files "start-jira.sh" and "stop-jira.sh" and add the following lines at their top:


export PATH="/Library/Internet Plug-Ins/JavaAppletPlugin.plugin/Contents/Home/bin:$PATH"
export JAVA_HOME="/Library/Internet Plug-Ins/JavaAppletPlugin.plugin/Contents/Home"
export JRE_HOME="/Library/Internet Plug-Ins/JavaAppletPlugin.plugin/Contents/Home"
export JIRA_HOME="/Users/thomas/Documents/Jira"

You should now be able to startup Jira, from the Terminal, by running the "start-jira.sh" script. The best thing is that Jira handles the sleep mode a laptop just fine (at least it does so on OS X), so you can safely forget about your Terminal session and close it. I've had Jira run for days on end, with many sleeps and resumes each day!


Upgrading Jira should be as easy as downloading the latest archive (step 1) and then repeating steps 5 and 6 on the files from the new installation. All Jira data lives outside of the installation path, thanks to step 3.


EDIT: If you ever need to move your Jira data directory elsewhere (or rename it), then you'll need to re-adjust the setting of JIRA_HOME in the shell scripts. You will also need to change the database path in dbconfig.xml (which lives inside your Jira data directory). 


Passed my NACA examination

$
0
0
NACA logo

With many thanks to Nexpose consultant Mark Doyle for his trust in me and his coaching and with thanks to my colleagues at $CLIENT for offering me the chance to learn something new!


This morning I passed my NACA (Nexpose Advanced Certified Administrator) examination, with an 85% score.


While preparing for the exam I searched online to find stories of test takers, describing their experiences with the NCA and NACA exams. Unfortunately I couldn't really find any, aside from one blogpost from 2012. 


For starters, the exam will be taken through Rapid7's ExpertTracks portal. If you're going to take their test, you might as well register beforehand. Purchasing the voucher through their website proved to be interesting: I ran into a few bugs which prevented my order from being properly processed. With the help of Rapid7's training department, things were sorted out in a few days and I got my voucher.


The examination site is nice enough, though there are two features that I missed while taking the test:


  1. There is no option to mark your questions for review, a feature most computer-based exams provide.

  2. Even if you could mark your questions, there apparently is no index page that allows you to quickly jump to specific questions. 


I made do with a notepad (to mark the questions) and by editing the URL in the address bar, to access the questions I wanted to review. 


The exam covers 75 questions, is "open book" and you're allowed to take 120 minutes. I finished in 44 minutes, with an 85% score (80% needed to pass). None of the questions struck me as badly worded, which is great! No apparent "traps" set out to trick you. 


Games I loved: League of Legends

$
0
0
The four LOL ribbons

The past two years I haven't been keeping this diary, so I've played a lot of games that I really enjoyed which I haven't written about. This's the first update in a series about games that I absolutely love (or loved) and which played an important role in my life. First up: League of Legends


LoL is the prime example of something I've often been "accused" of: "Thomas, you just can't do anything without taking it seriously!


Let's back it up a little bit... I'd heard of MOBA games before 2014: I knew of the Warcraft 3 spinoff DotA and I'd heard about LoL from my colleague Wim. They sounded like fun games, but as is often the case I never had time to give'm a try. In the summer of 2014 I started watching the LoL championships online. Season 3 was very exciting and I loved the "Road to Worlds" documentary. 


During our holiday in Austria I picked up another MOBA, on the iPad: Fates Forever. It was a very fun game and easy to pick up for newbies like myself. I got into the community and even designed a sweater for myself, with my favorite character Renwil. FF went offline in the fall of 2015, so I can't play the game anymore.


Despite watching LoL championships and playing FF I still kept away from actually playing LoL. As my mom once told me: “Whenever we’d take you somewhere new, I’d see you hanging around the sidelines, watching very intently. You were always trying to mentally grasp what was going on and how things worked. And you almost never dared to actually participate until you’d figured it out." And that's true, I was intimidated by LoL and didn't want to fsck up right from the start. 


By the end of December 2014 I had finished a long and hard certification process (RHCE) and I told myself: "This is it! I'm gonna take three months and do nothing except gaming!". That's when I dove in! And that's where the aforementioned accusation comes in ^_^


I didn't dick around with LoL! I decided that I was going to study hard to play a limited pool of characters that each fit two roles, so I could be of good use to any team I'd join for a game. Volibear was my very first character and I shelled out the money to buy him out-right. What's there not to love! A huge, friggin' polar bear with armor! I learned to play him in both toplane and the jungle. But my true love would become the support role, which is a role that suits my real life: I love being the one who supports his team, so they can win the day. Soraka is my all-time favorite character (my "main") and later on I also learned to play Janna, Annie, Lux and Morgana.


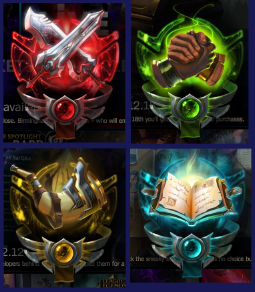
To be honest, I feel that I got pretty good. I found a few friends with whom I could play great games and I often got recognized as a valuable contributor. Over the three to four months which I played the game, I worked myself up to level 30 (to most people the "real" start of the game) and I was awared all four "honor ribbons" (shown top-left). I'd pore over patch notes and study pro games as well as replays of my own team's games. It was a lot of hard work, but I had an absolute blast! 


By April of 2015 the time came for me to return to studying. I started my Oracle studies by then and I also got some extra work. I said my farewells to my friends, most importantly Hedin (who played as Limerick / Dovetail) from the Farroe Islands. He was an absolute joy to play with! I never did start Ranked play, so I don't know how good I could've gotten. I'm sure that I was only on the very first step of properly learning League of Legends.


CTF036 security event in Almere

$
0
0
My notes from CTF036

A few weeks ago Almere-local consulting firm Ultimum posted on LinkedIn about their upcoming capture the flag event CTF036. Having had my first taste of CTF at last fall's PvIB event, I was eager to jump in again! 


The morning's three lectures were awesome!


  • Neelen & van Duijn's talk on boobytrapping your network was fun to theorycraft new ideas, while it also gave me a blast of nostalgia: their three ideas of making attrictive fake hosts, fake admin-users and fake files all reminded me of Clifford Stoll's "The Cuckoo's Egg" where the exact same ideas were applied to catch a CCC-hacker in the early eighties. 

  • Tong Sang's talk on bruteforcing RFID badges might not have resulted in a practical attack vector, but it still gave a nice look into the workings of RFID access systems.

  • Schuijlenburg gave an interesting look into "mobile forensics" as performed by the dutch, military police. Good stuff!


The afternoon's CTF provided the following case (summarized): "De Kiespijn Praktijk is a healthcare provider whom you are hired to attack. Your goal is to grab as many of their medical record identifiers as you can. Based on an email that you intercepted you know that they have 5 externally hosted servers, 2 of which are accessible through the Internet. They also have wifi at their offices, with Windows PCs." The maximum score would be achieved by grabbing 24 records, for 240 points. 


I didn't have any illusions of scoring any points at all, because I still don't have any PenTesting experience. For starters, I decided to start reconnaissance through two paths: the Internet and the wifi. 


As you can see from my notes it was easy to find the DKP-WIFI-D (as I was on the D-block) MAC address, for use with Reaver to crack the wifi password. Unfortunately my burner laptop lacks both the processing power and a properly sniffing wlan adapter, so I couldn't get in that way. 


I was luckier going at their servers:


  • Their website was found at www.dekiespijnpraktijk.nl, at 172.20.16.15. It runs on Drupal, which included a forum (which in turn allowed HTML comments). 

  • Digging the DNS server for dekiespijnpraktijk.nl found aliases like ns1 and mta for that IP. An nmap scan showed ssh, dns, http, squid and webmin.

  • A ping sweep across that IP range also found 172.20.16.25 which apparently didn't have DNS records, but turned out to be running their IMAP and POP, as well as Squirrelmail webmail. 

  • The second server ran ssh, ftp, www, imap and pop.

  • From their forums I ascertained that there were at least four verified user accounts: Sanne (an employee) and patients Remon, Barry and Marijke. I couldn't register a new account. 

  • Firing up Metasploit allowed me to use an exploit on the .25 hosts's ProFTPd, to immediately get root access. BAM! GREAT!

  • On the .25 host I found:


  1. Sanne's home directory, which actually contained a text file with "important patients". BAM! Three medical records!!

  2. The /etc/shadow file had an easily crackable password for user Henk. Unfortunately that username+password did not let me access the .15 server through SSH or Webmin.

  3. Sanne has a mailbox! In /home/vmail I found her mailbox and it was receiving email! I used the Drupal site's password recovery to access her Drupal account. 


I didn't find anything using Sanne's account on the Drupal site. But boy was I wrong! 16:00 had come and gone, when my neighbor informed me that I simply should have added q=admin to Sanne's session's URL. Her admin section would have given me access to six more patient records! Six! 


Today was a well-spent day! My first time using Metasploit! My first time trying WPA2 hacking! Putting together a great puzzle to get more and more access :) Thanks Ultimum! I'm very much looking forward to next year's CTF!


A very productive week: BoKS, Puppet and security

$
0
0

I have had a wonderfully productive week! Next to my daily gig at $CLIENT, I have rebuilt my burner laptop with Kali 2016 (after the recent CTF event) and I have put eight hours into the BoKS Puppet module I'm building for Fox Technologies.  


The latter has been a great learning experience, building on the training that Ger Apeldoorn gave me last year. I've had a few successes this week, by migrating the module to Hiera and by resolving a concurrency issue I was having.


With regards to running Kali 2016 on the Lenovo s21e? I've learned that the ISO for Kali 2016 does not include the old installer application in the live environment. Thus it was impossible to boot from a USB live environment to install Kali on /dev/mmcblk1pX. Instead, I opted to reinstall Kali 2, after which I performed an "apt-get dist-upgrade" to upgrade to Kali 2016. Worked very well once I put that puzzle together.


Viewing all 173 articles
Browse latest View live